Shrimp Fried Rice | Dinnertime and the Livin’s Easy

I love Chinese food. Takeout. There is nothing better than MSG filled rice and noodles out of a white cardboard box. I decided to start trying to incorporate non-takeout Chinese meals into the weekly menu since virtually traveling to China every day to teach with VIPKID. My dumpling attempt was an epic fail that made all my students’ moms laugh on Chinese social media (yeah, I am totally on Chinese social media 😂).

But. I gotta say. My Shrimp Fried Rice came out yummy! And was described by one Chinese mom as, and I quote, “香.” (Translation: Fragrant). Best part was both kids asked for seconds!

Shrimp Fried Rice

  • Servings: 4
  • Difficulty: easy
  • Print

Ingredients:
1 cup of dry rice, prepare as directed
1/2 to 1 cup of frozen veggies, your choice
3 eggs, lightly beaten
1 package of frozen shrimp, around a pound, thawed
2 tablespoons sesame oil, more or less as needed
2 tablespoons soy sauce, more or less to taste

  • For frozen veggies, I usually use only chopped broccoli. Because. Picky eaters. I also will use carrots and peas but the peas get picked out by 3/4 of my family. I’ll let you guess who eats them.
  • I like to use the raw, peeled, deveined, tail-off shrimp. Because. Well. It is so much easier. For everyone.
  • It is better to have slightly drier rice. Last time I made this, I accidentally let the rice boil too long before reducing to a simmer. As in it was on the verge of bubbling over. The rice was perfect because it wasn’t as soft and sticky. If you have other suggestion on getting the perfect rice, let me know!

Instructions:
1. Start the rice. Usually rice takes about 20 minutes to cook.

2. When there is about 10 minutes left for the rice, heat up the sesame oil in a large skillet or wok, if you have one. I need a wok.

3. Add the frozen veggies and cook for about 3 to 5 minutes. I kind of push it around as it cooks.

4. Push all the veggies to one side of the pan and add the lightly beaten egg to the empty side. Push those around as the cook as you do for scrambled eggs. Because. That’s what they are. Once they are mostly cooked, mix up with the veggies, breaking up the eggs in the process.

5. Add your thawed shrimp. At this time check your rice and, if it is done, remove from heat.

6. Once the shrimp is mostly pink, add the cooked rice. Mix it all up.

7. Add the soy sauce. It will seem like there is not enough for the pile of food in your pan. But just start mixing. And mixing some more. You will be amazed that within minutes, everything is lightly soy sauced. If you like more, add more. But I would only add a little at a time. A little goes a long way.

8. Keep mixing for a few minutes to let the rice become slightly fried.

Recipe Notes: “Push around” is a very technical cooking term. It is not as vigorous as “stirring” but more prolonged than “mixing. So push that stuff around the skillet to keep it cooking evenly and to prevent it from burning!

Nutritional information per BIG serving (using 1 cup cooked rice): Calories 336; Fat 9.6 g (Sat. Fat 1.6 g, Unsat. Fat 7 g); Carbs 38 g (Fiber 2.6; Sugar 1.4 g); Protein 25.4 g; Cholesterol 0 mg; Sodium 658 mg; Potassium 135 mg

You can switch up the protein or just do Veggie Fried Rice too. I think I would probably start cooking beef or chicken before the veggies though because they take longer to cook than shrimp.

Fast, easy and yummy!! And SO much healthier than takeout!
18 Months | VIPKID

vipkid_teach

Yesterday, I received an email from VIPKID telling me it is time to renew my 4th contract! That means I have been teaching with VIPKID for nearly 18 months! April 1st also marks 1 year since I have been teaching full time hours with VIPKID.

vipkid_teacher

As of today, I have taught 4,782 classes and 1,681 students. That adds up to 119,300 minutes of teaching amazing children on the other side of the world. I literally travel to China every day via the magic of the internet!

Amazing. That is probably the best word to describe this entire VIPKID experience over the last 18 months. I have met so many children who never cease to amaze me. These kids, as young as 3 and 4, are some of the brightest, hardest working children I have ever met. With each 25-minute class, I make connections with children and their families on the other side of the world. Making kids and babies (I love meeting baby siblings) on the other side of the world laugh never, ever gets old. I have so many regular students, some that I have been teaching for over a year, that I adore. I miss them when I don’t see them and I have really been able to get to know them, 25 minutes at a time. I hope to someday soon get to China so I can squeeze as many of them as possible.

The job itself almost all pros for me. I can make my schedule and set my hours without approval or running it by anyone. The lesson plans are all done for me so I log in every day, teach and when I am done teaching, I am done. I don’t have to interact with managers, supervisors, or the company unless I want to besides emails they send out with information about promotions, updates, and other mostly useful information. I don’t have to leave my house so there is no commute time added to my work day. I don’t even need to put on matching pants, appropriate work pants or even actual pants, if I so desire. I do always wear pants though!

For me, the only real con of working with VIPKID is the hours. Doing VIPKID full time makes for some crazy hours because you work Chinese time. I only work during the afternoons and evenings in China, which is the middle of the night and morning hours EST. I usually work 2 am to 10 am on the weekends. Weekdays usually start a little later (3:30 am to 4:30 am) because of the kids’ school day (China is 12 hours ahead of me in North Carolina). BUT. There is a plus side to these hours. I am home and available during most of MY kids’ school day. So if they have an event, their teacher needs a volunteer, they get sick or they stay home sick, I am available! I am also home to pick them from school every day and be with them after school until I go to bed. For me, it is totally worth getting up in the middle of the night to be there for my babies.

vipkid_teacher

The pay. It’s a semi-con. In all honesty, I could be making a lot more money if I went out and got a “real” job in my field. I have a law degree and was a litigation attorney before I quit to be home with my kids. I could be, probably should be, making more than $20 to $24 an hour. But. I would have to put on real pants. Drive to an office. Work long hours and overtime. Bring work home with me. Possibly travel.

I would not be as flexible for my kids. They would need to go to after school care every day and go to day care during the summer. After a long school day that starts at 7:30 am, I am willing to make the necessary sacrifices to be home with them after school and spend the summers with them. They are only children for such a short amount of time and I missed so much of their baby and toddler years. The mama guilt is real. And its strong.

Both of the “cons” of this gig are almost non-existent if you are teaching for VIPKID as a side gig. You can tailor your schedule to an hour or two of classes before your day job if you don’t mind getting up a little earlier. Or limit it to Friday/Saturday evenings. Or Saturday/Sunday mornings. An average of an hour a day will bring home approximately an extra $600 a month. When the day comes that I decide to put on real pants and get an out-of-the house job, you can bet I will still be teaching with VIPKID on the side! Besides loving my regular students, the extra income is so easy and FUN to make!

If you are interested in teaching with VIPKID, as a side gig, full time or somewhere in between, I would love to help you with the process! I have a lot of experience under my belt after 18 months and can help you get started! You can get more information and fill out the VIPKID application:

Instant Pot Vegetable Soup | Under Pressure

What’s the best way to get like all of your vegetable servings for the day in one meal? Vegetable soup, of course. What’s the best way to get a week or more of homemade vegetable soup lunches in just a couple of hours? The Instant Pot, baby. This low calorie (0 points if you do WW), high fiber, veggie loaded soup is on my lunch menu most days. It is filling and delicious.

Before we get to the recipe, however, I want share with you a story that warms my heart more than the vegetable soup you are about to make. I teach English to children in China with VIPKID. Recently, I was teaching one of my higher level students the folktale, Stone Soup. We were talking about the story and soup…

STOP! I kid, I kid. You will never find a long winded story about some random ass moment in my life before the recipe. I know why you are here. For the food. And. I know from experience, you don’t want to waste time scrolling. Scrolling. Scrolling down the river. Please tell me that I am not the only one who randomly turns what I am thinking into song. But. I digress. Onto the recipe.

instant-pot-vegetable-soup

Vegetable Soup

  • Difficulty: easy
  • Print

Ingredients:
About 4 carrots, sliced
About 4 stalks of celery, sliced
1 zucchini (more or less or none to preference), diced
1 onion (more or less to preference), diced
2 cans of diced tomatoes with liquid
1 can of light kidney beans, drained and rinsed
1 can of Great Northern beans, drained and rinsed
1 can of Italian cut green beans, drained
1 can of sweet corn, drained
8 cups (2 regular sized boxes) of broth (chicken, beef, vegetable)
2 tablespoons of tomato paste
2 teaspoons basil
2 teaspoons parsley
1 teaspoon basil
1 teaspoon salt
1/2 teaspoon thyme
1/4 teaspoon rosemary
2 bay leaves

  • The vegetables are a guideline. Omit what you want. Add what you want. If you don’t like beans like the rest of my family, don’t add beans. If the rest of your family doesn’t like beans, add beans and have all the soup to yourself. Like I do.
  • If you want to minestrone it up, throw in about 1 1/3 cups of small pasta – elbows, shells, ruffles.

Instructions:
1. Prepare all your fresh veggies so they are ready to dump. The prep time of 30 minutes was a complete estimate. It will probably take you less time than that. It probably takes me longer to prepare 4 carrots, 4 stalks of celery and a zucchini. For some reason, prepping takes me FOREVER. (still over here #becomingdomesticated)

2. If you are NOT including diced onions, skip ahead to step 4. If you are including diced onions, add 1-2 tablespoons of oil (I use grapeseed oil) to the Instant Pot. Push Saute. Once the Pot heats up, add the diced onion and saute until they are softened.

3. Push Cancel.

4. Add everything else. Yes, I mean everything, including the pasta if you are adding pasta. I usually dump the fresh veggies, followed by the canned veggies, then the broth and finally the herbs. But really, it doesn’t matter. It is all going in. Stir it up real good.

5. Put your lid on the Instant Pot. Make sure the vent is on Sealing/closed.

6. Set the Instant Pot to manual pressure for 4 minutes.

7. Go about your day. Pressurizing will vary based on the model of your Instant Pot. It will take longer than many of your recipes because the Pot is filled so much with yummy goodness.

8. Once pressure is reached, the timer will switch from ON to the 4 minute countdown. When the 4 minutes is complete, push Cancel.

9. I would let it natural release for at least 15 minutes. To release the pressure, move the vent to Open. Usually, I just leave it to naturally release for longer because I am doing other things.

Nutritional information per 1 CUP serving (WITHOUT PASTA): Calories 90; Fat .5 g (Sat. Fat .01 g, Unsat. Fat .04 g); Carbs 17.7 g (Fiber 5; Sugar 5 g); Protein 5 g; Cholesterol 0 mg; Sodium 774 mg; Potassium 220 mg

And there you have. Easy, delicious, healthy and fast-for-a-soup Vegetable Soup. I store it in the the fridge until it is gone. Switching it to a smaller storage bowl every couple of days.

LipSense | Go Buy It Or Pass By It

LipSense. The must have product du jour. I have been invited to multiple LipSense parties over the past several months. I was always intrigued, but for some reason, not quite ready to take the plunge.

Honestly, despite some half assed attempts, I have never been much of a lip product girl. All the lipstick I own was a pressure purchase after having my makeup professionally done for a wedding or our annual family photography session. I always justified the purchase with the notion that I might need to reapply later. Basically, you can count the number of lipsticks I own on one hand. Lip gloss always seemed like something I wanted. In theory. I would grab a pretty, sparkly tube at the grocery store, only to hate it as soon as I put it on and my hair was stuck in it. To the bottom of the purse it would go. So lips have been au natural most of my life.

Over the last few years, however, I have been a hard core Younique girl. Pretty much my entire makeup bag is Younique products. I decided to try their lip gloss early on, and much to my surprise, I LOVE it. For the first time in my life, I had shiny, sparkly, colorful lips! I have tubes in my car, in my purse, at my desk. It’s not sticky and there is a mirror on the tube. Sold.

So perhaps it was my love affair with Younique that made me pause about trying a new brand on my lips. But when my friend (and photography and LLR client) Kate signed on as a LipSense consultant, I knew my time to jump off the fence had come. And jump I did. Head first into a pool of pretty lip color.

LipSense is the headliner product for makeup and skincare company, SeneGence. It isn’t a lipstick or even a lip stain. It is like this crazy, magic lip color. And the claim is that it is actually good for your lips! Like most commercial products, most of the stuff we put on our lips is made up of fillers and waxes and all around crap to give us the illusion that our [insert body part] are soft and supple. In reality, we just have a whole lotta buildup. So the first few weeks of using LipSense exfoliates and sheds all the crap off your lips, while the moisturizing Glossy Gloss does its thing. I must say after about 3 weeks of using LipSense, my lips do, somehow seem different.

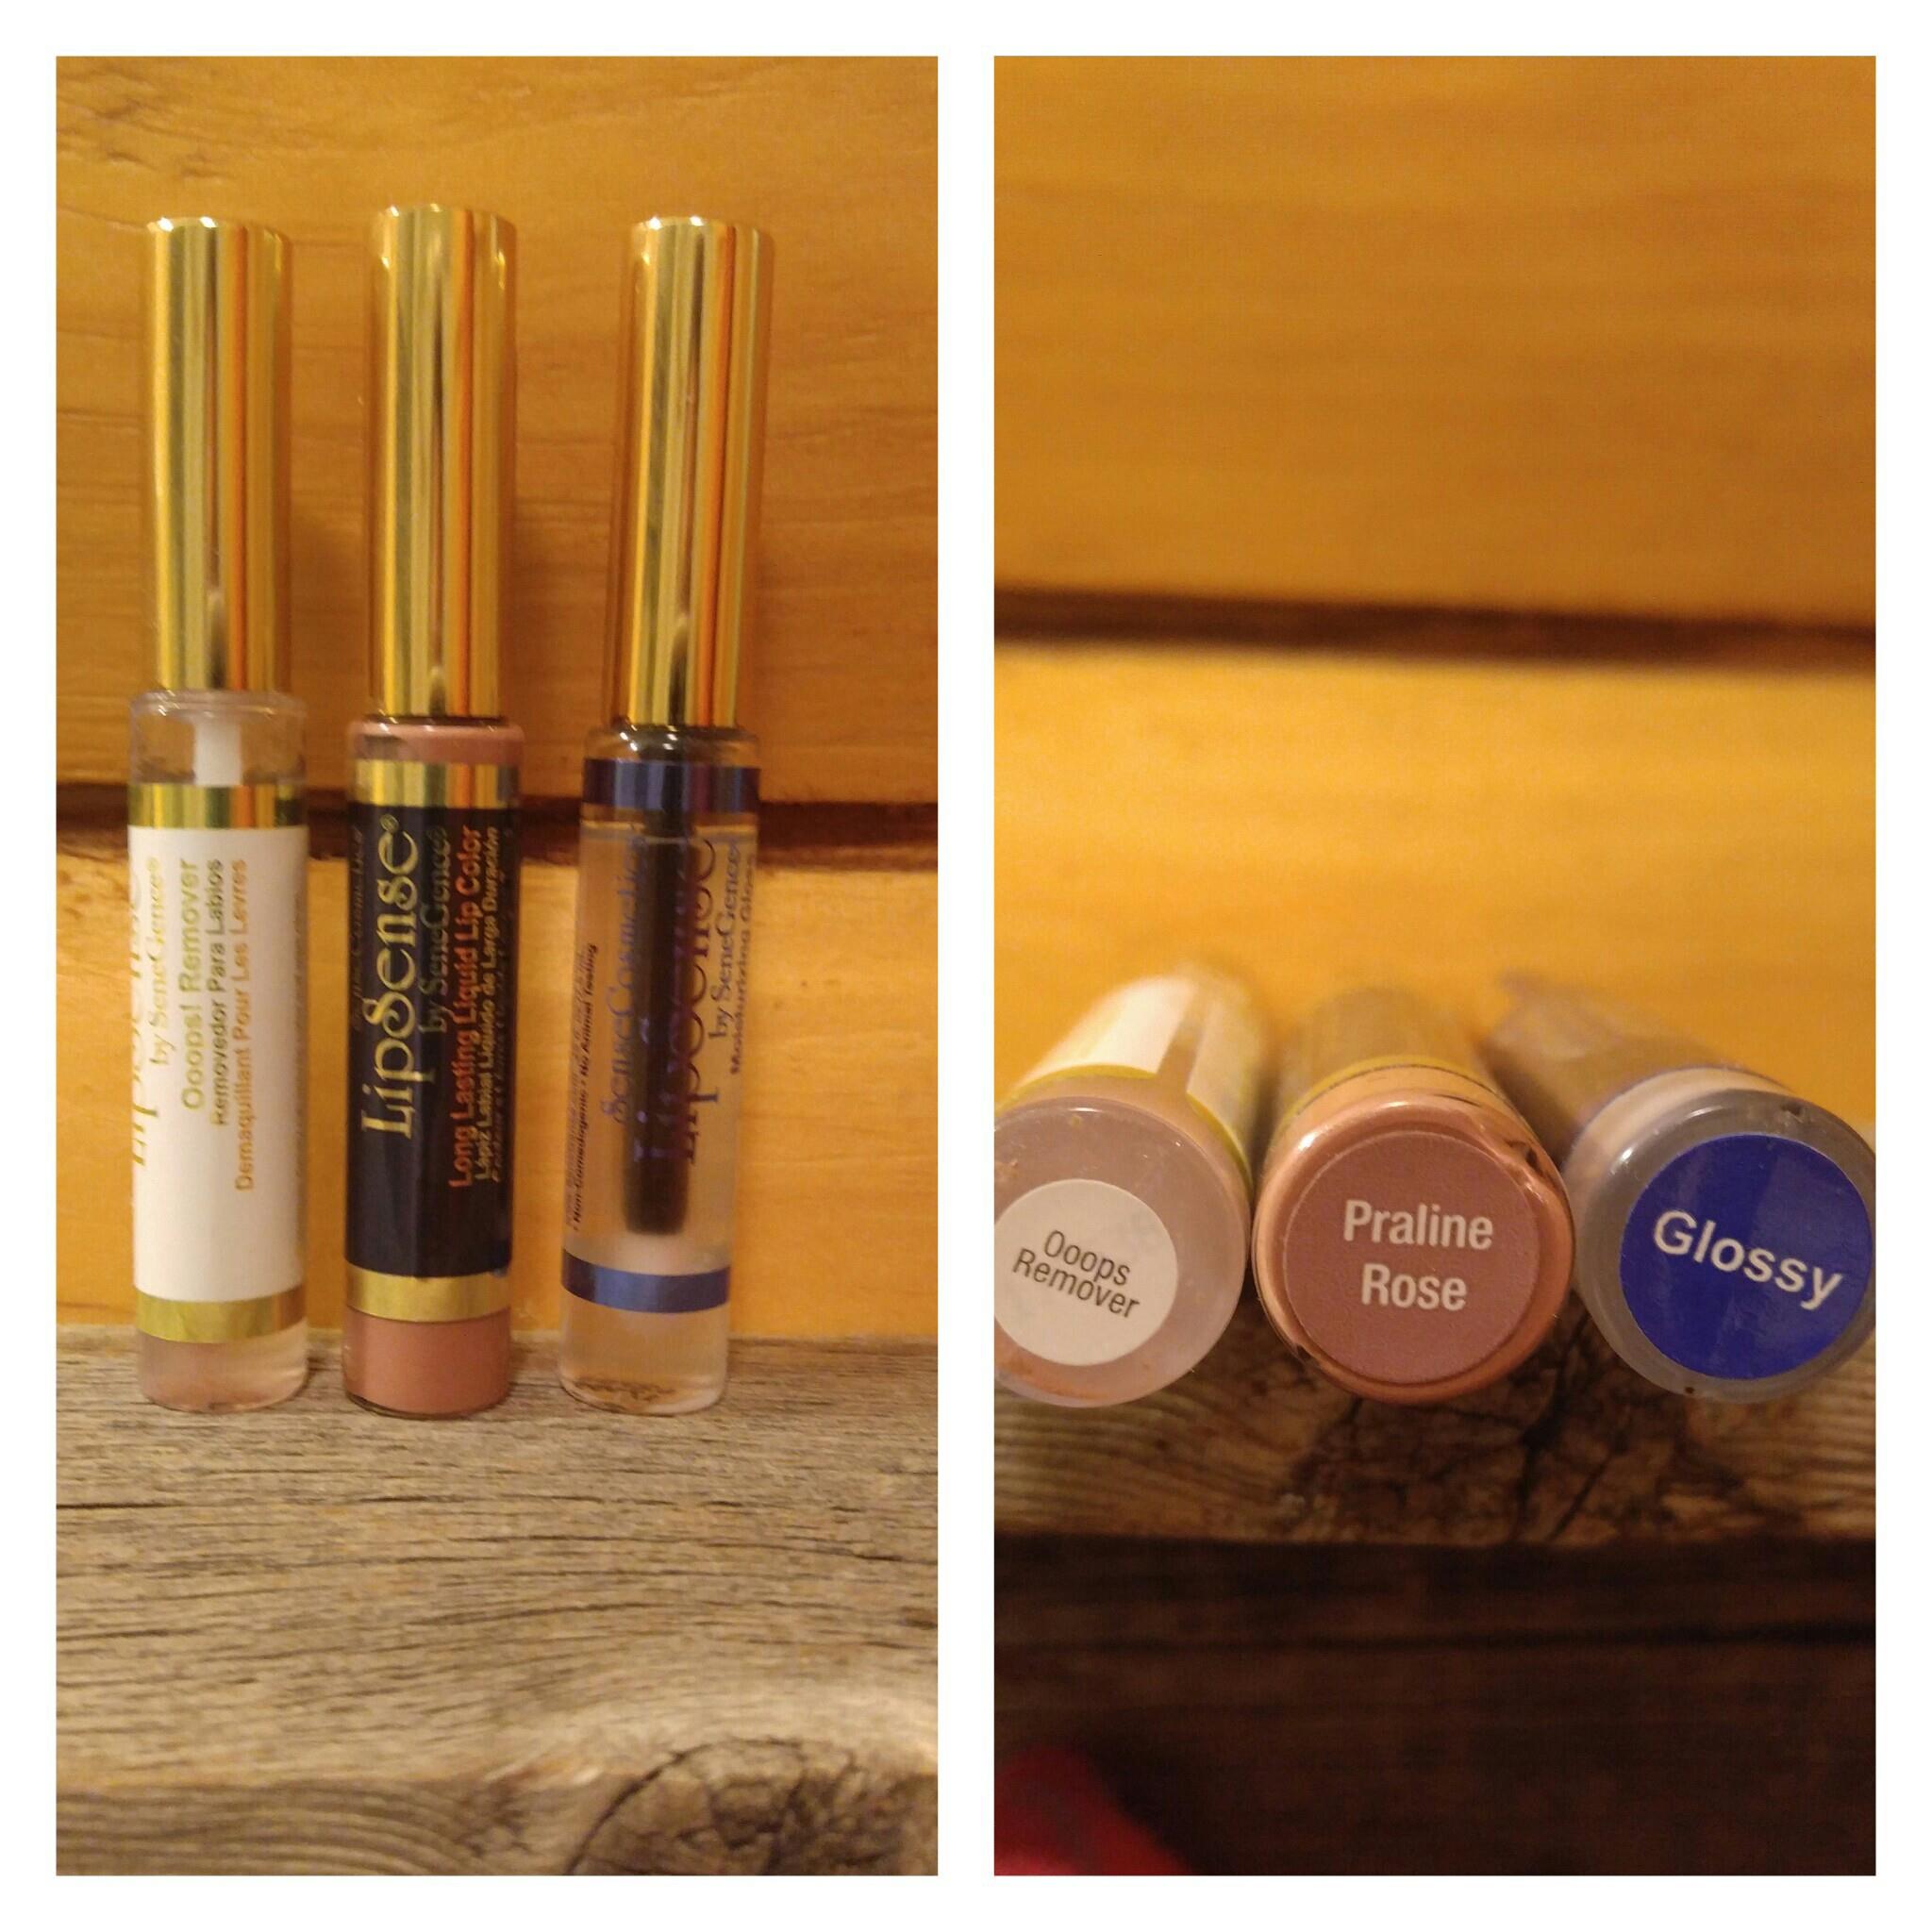
I bought the Starter Collection to see what all the hype was about. The Starter Collection includes an Oops! Remover, a color of your choice (I picked a pretty neutral, Praline Rose) and a Gloss (I picked Glossy Gloss).

18052348_10103788019345716_434232269_o

I was a bit skeptical with the first application. It is different than just slapping on some gloss and going. I did as the instructions provided by my Lip Lady said, cleaning my lips first with the Oops! Remover. Then I applied the first layer of Praline Rose. It stung. It felt weird and when I let my lips touch in the slightest, they sort of stuck together. But. I forged ahead. Layer two stung less, but I still couldn’t let my lips touch resulting in the strangest of faces. Layer three, ohhhh, this is pretty! Shit. Don’t let your lips touch. Once I thought the color was dry, I put on the Glossy Gloss and was able to let my lips touch, smack, eat, suck (a STRAW! Get your mind outta the gutter), ANYTHING! And the color stayed put! The color was gorgeous, and,by the end of the day, still there!

praline_rose_lipsense

Of course, I immediately needed more. Like, give me all the colors! And glosses! Glossy Gloss is not the only option. MATTE GLOSS. Need I say more?! It’s freaking amazing. Here is perhaps my favorite color, Sheer Berry, with both Matte and Glossy Gloss.

sheer_berry_lipsense

Ordering LipSense is a little more than just going to a site and finding your dream color. Most consultants seem to carry inventory in hand, and purchasing directly from them seems to be the method of choice. With the brand popularity growing like a wild fire, many of the colors are out of stock almost as soon as they are restocked. I have heard that consultants have the option of web ordering, but I have not experienced purchasing that way yet. I did peruse SeneGence’s website at one point, trying to see different colors but it is not what I consider user friendly and I gave up quickly. Regardless, the urgency arises when you see your girl has a color you have been crushing on to get it before it’s gone. Sound familiar?

My collection has grown to 2 glosses and 5 colors: Praline Rose, Pomegranate, Blu Red (my first Color of the Month surprise!), Sheer Berry and Kiss for a Cause (OBSESSED).

lipsense

And as if this isn’t all amazing enough, you can create different colors with COCKTAILS! You always need 3 layers of color. The first layer primes your lip. The second is the star of the show all day and the third takes the beating of whatever your day throws at you. So you can do 3 layers of one color, or start mixing it up! Simply put. 2 colors will yield you 8 different looks. Here is my Blu Red-Praline Rose-Praline Rose cocktail! For reference, the second picture is what 3 layers of Blu Red looks like on me! Seriously, look at the difference!

lipsense_cocktail_blu_red_praline_rose

lipsense_blu_red

CONCLUSION!!! LipSense – Go Buy It or Pass By It? I am giving it a FIRM GO BUY IT! Like. Right. Now. I have been overall impressed by this product, and NEED more. Most days, I get all day coverage. In fact, most mornings (because I terrible about washing my face at night) I wake up and still have color on my lips! I do usually try to reapply my gloss a couple of times a day to help protect and prolong the color because I have noticed that if I don’t, the color doesn’t last quite as long. But seriously, what other product is going to give you even 4-6 hours of color without any re-application? …… Exactly.

Go now. Find a friend who sells. And if by some miracle nobody in your friend list is a Lip Lady, shoot me a message and I will connect you with my girl. Cause, yeah, I’ve got a girl.


I’ve Got a Girl | Keepin’ It Real

The other day, I was thinking while in the shower … my best place for thinking. I try to take my showers while Maddie Jane is at Pre-K so that the house is completely quiet and I can think (and cleanse) without interruption. Or without yelling STOP! at the top of my lungs, in my “I mean it voice,” only to have to do it again 5 seconds later. Rinse and repeat.

So as I washed my face with my Mary Kay facial cleanser, followed by using some of my Lemongrass Body Polish on my dry, itchy, almost done with winter skin and then stepping out onto my Norwex Bath Mat, I started thinking about HOW MANY of the products I use and consume every. single. day. are from a kick ass direct sales consultant.

I make Wildtree dinners regularly, using almost exclusively Pampered Chef tools. I put the leftovers in my Tupperware, clean the kitchen with my Norwex products, while clothed in LuLaRoe with Younique products on my face, LipSense on my lips and Jamberry lacquer on my nails. All while a relaxing blend of Young Living essential oils being diffused.

There are days when everything touching my body except my underwear and shoes is a direct sales product (if you know an underwear girl, give me her info stat!). I can make an entire meal using direct sales products from the measuring cups to the chopper to the pots and pans. Hell. I just recently bought SHEETS for my bed from a direct sales consultant! And they are SOFT!

I've got a

I try to buy as much as I can from direct sales consultants for several reasons. For one, I really, genuinely love all of the products that I use. Some of the best, top of the line, long lasting products I have are from direct sales consultants. It is some good stuff! Trust me, I wouldn’t use them if I didn’t love them. And I certainly wouldn’t give them the shout outs that I do if I didn’t love them. Of course, I also love the convenience of shopping online. Seriously, what is better than shopping at home in your pajamas? Not the mall. But quite possibly shopping at a friend’s home filled with good company and tasty treats (bonus points for wine). But what I love even more than good shit and convenient shopping is that I am actually helping and supporting women hustling and working their tails off to make a difference in their family’s lives. Whether it is as a side business to supplement her full time job or her way to stay home with her kiddos and still contribute, I want to support her. For putting herself out there, for taking a risk, for being a freakin’ rock star boss lady, I want to support her. So when I say, “I’ve got a girl.” I mean it. I’ve got a girl, and she is freakin’ awesome. And so is the stuff she is slinging. Make a real difference and get your makeup, your clothes, your meal solutions, your cleaning products, your nail art, your bath products, your kitchen gadgets, and for the love of all things holy, your SHEETS, from a kick ass woman and make a difference in her world!

It Takes a Village | Keepin’ It Real

We have all heard it before. It takes a village to raise a child. And it should. Community, love, support, encouragement, unity, inclusion. These are all basic things needed to raise hardworking, empathetic, productive adults. But. I fear it is slipping away. Being replaced by the modern day Wild West, social media.

There should be a great fear, a common fear, among us all when children become the target of hateful, disgusting, and inappropriate posts by adults. When a child, a 10 year old child, is the victim of social media attacks. Barron Trump did not ask to be put in the spotlight, in the public eye. He did not ask to have a businessman turned celebrity turned President of the United States as his father. He is just a child.

16229863_10103576713768786_1965746204_o

16196182_10103576665365786_1904958204_o


img_1516-575x414

img_1512-575x331

And then there is this gem of a tweet. Posted by Saturday Night Live writer, Katie Rich.

screen-shot-2017-01-20-at-6-48-11-pm-650x307

I can only imagine the outrage I would see if the SNL writer made a post attacking someone’s race or national origin. Lives and careers would be destroyed in a blaze of fire across the interwebs. Over the last several days and months, we have seen a massive movement form. We have heard their voices, their concerns for the future. We have heard their cries.

But a hateful attack on an innocent child?!  Silence. 

Silence is tolerance. Tolerance becomes acceptance. We cannot accept attacks on our children. We cannot tolerate this type of behavior by adults. We cannot be silent when it comes to protecting our children.

silence-is-tolerance-we-cannot-tolerate-attacks-on-our-children

Where are the battle cries for our children? The uproar, the passion? Where is the call of action to Saturday Night Live to acknowledge the wrong done by one of its staffers? Looking through Saturday Night Live’s Facebook page, not a mention of Katie Rich’s tweet. No apology. Just silence … Tolerance … Acceptance. Most major news outlets have remained just as silent. Scrolling through my newsfeed, there are very few posts about the attack by adults on Barron Trump. It does not matter who his father is, or how much you dislike his father. Barron is a child. We must protect our children.

We all must rise together to say it is NOT alright to attack a child. That it is NOT alright to bully a 10 year old. That the children are off limits. Because the moment it becomes acceptable to publicly treat children like this is the moment we destroy this country, this society. If our children are raised in a world where it is accepted for adults to bully, degrade and attack children, then our children’s future is a scary place.

It takes a village to raise and protect our children, our future. It takes a village to stand up against those who hurt our children. We must treat and protect all children as if they are our own. Barron Trump is my son. And I will not silently accept or tolerate any attack on him. It takes a village.


Ohhhh Baby I Love … Jamberry Nails Lacquer

It has literally been months since I have painted my nails. We have been plagued with every virus out there since Christmas, and, damn, sick kids are demanding! I am behind on my work, behind on the house, and just, well, behind.

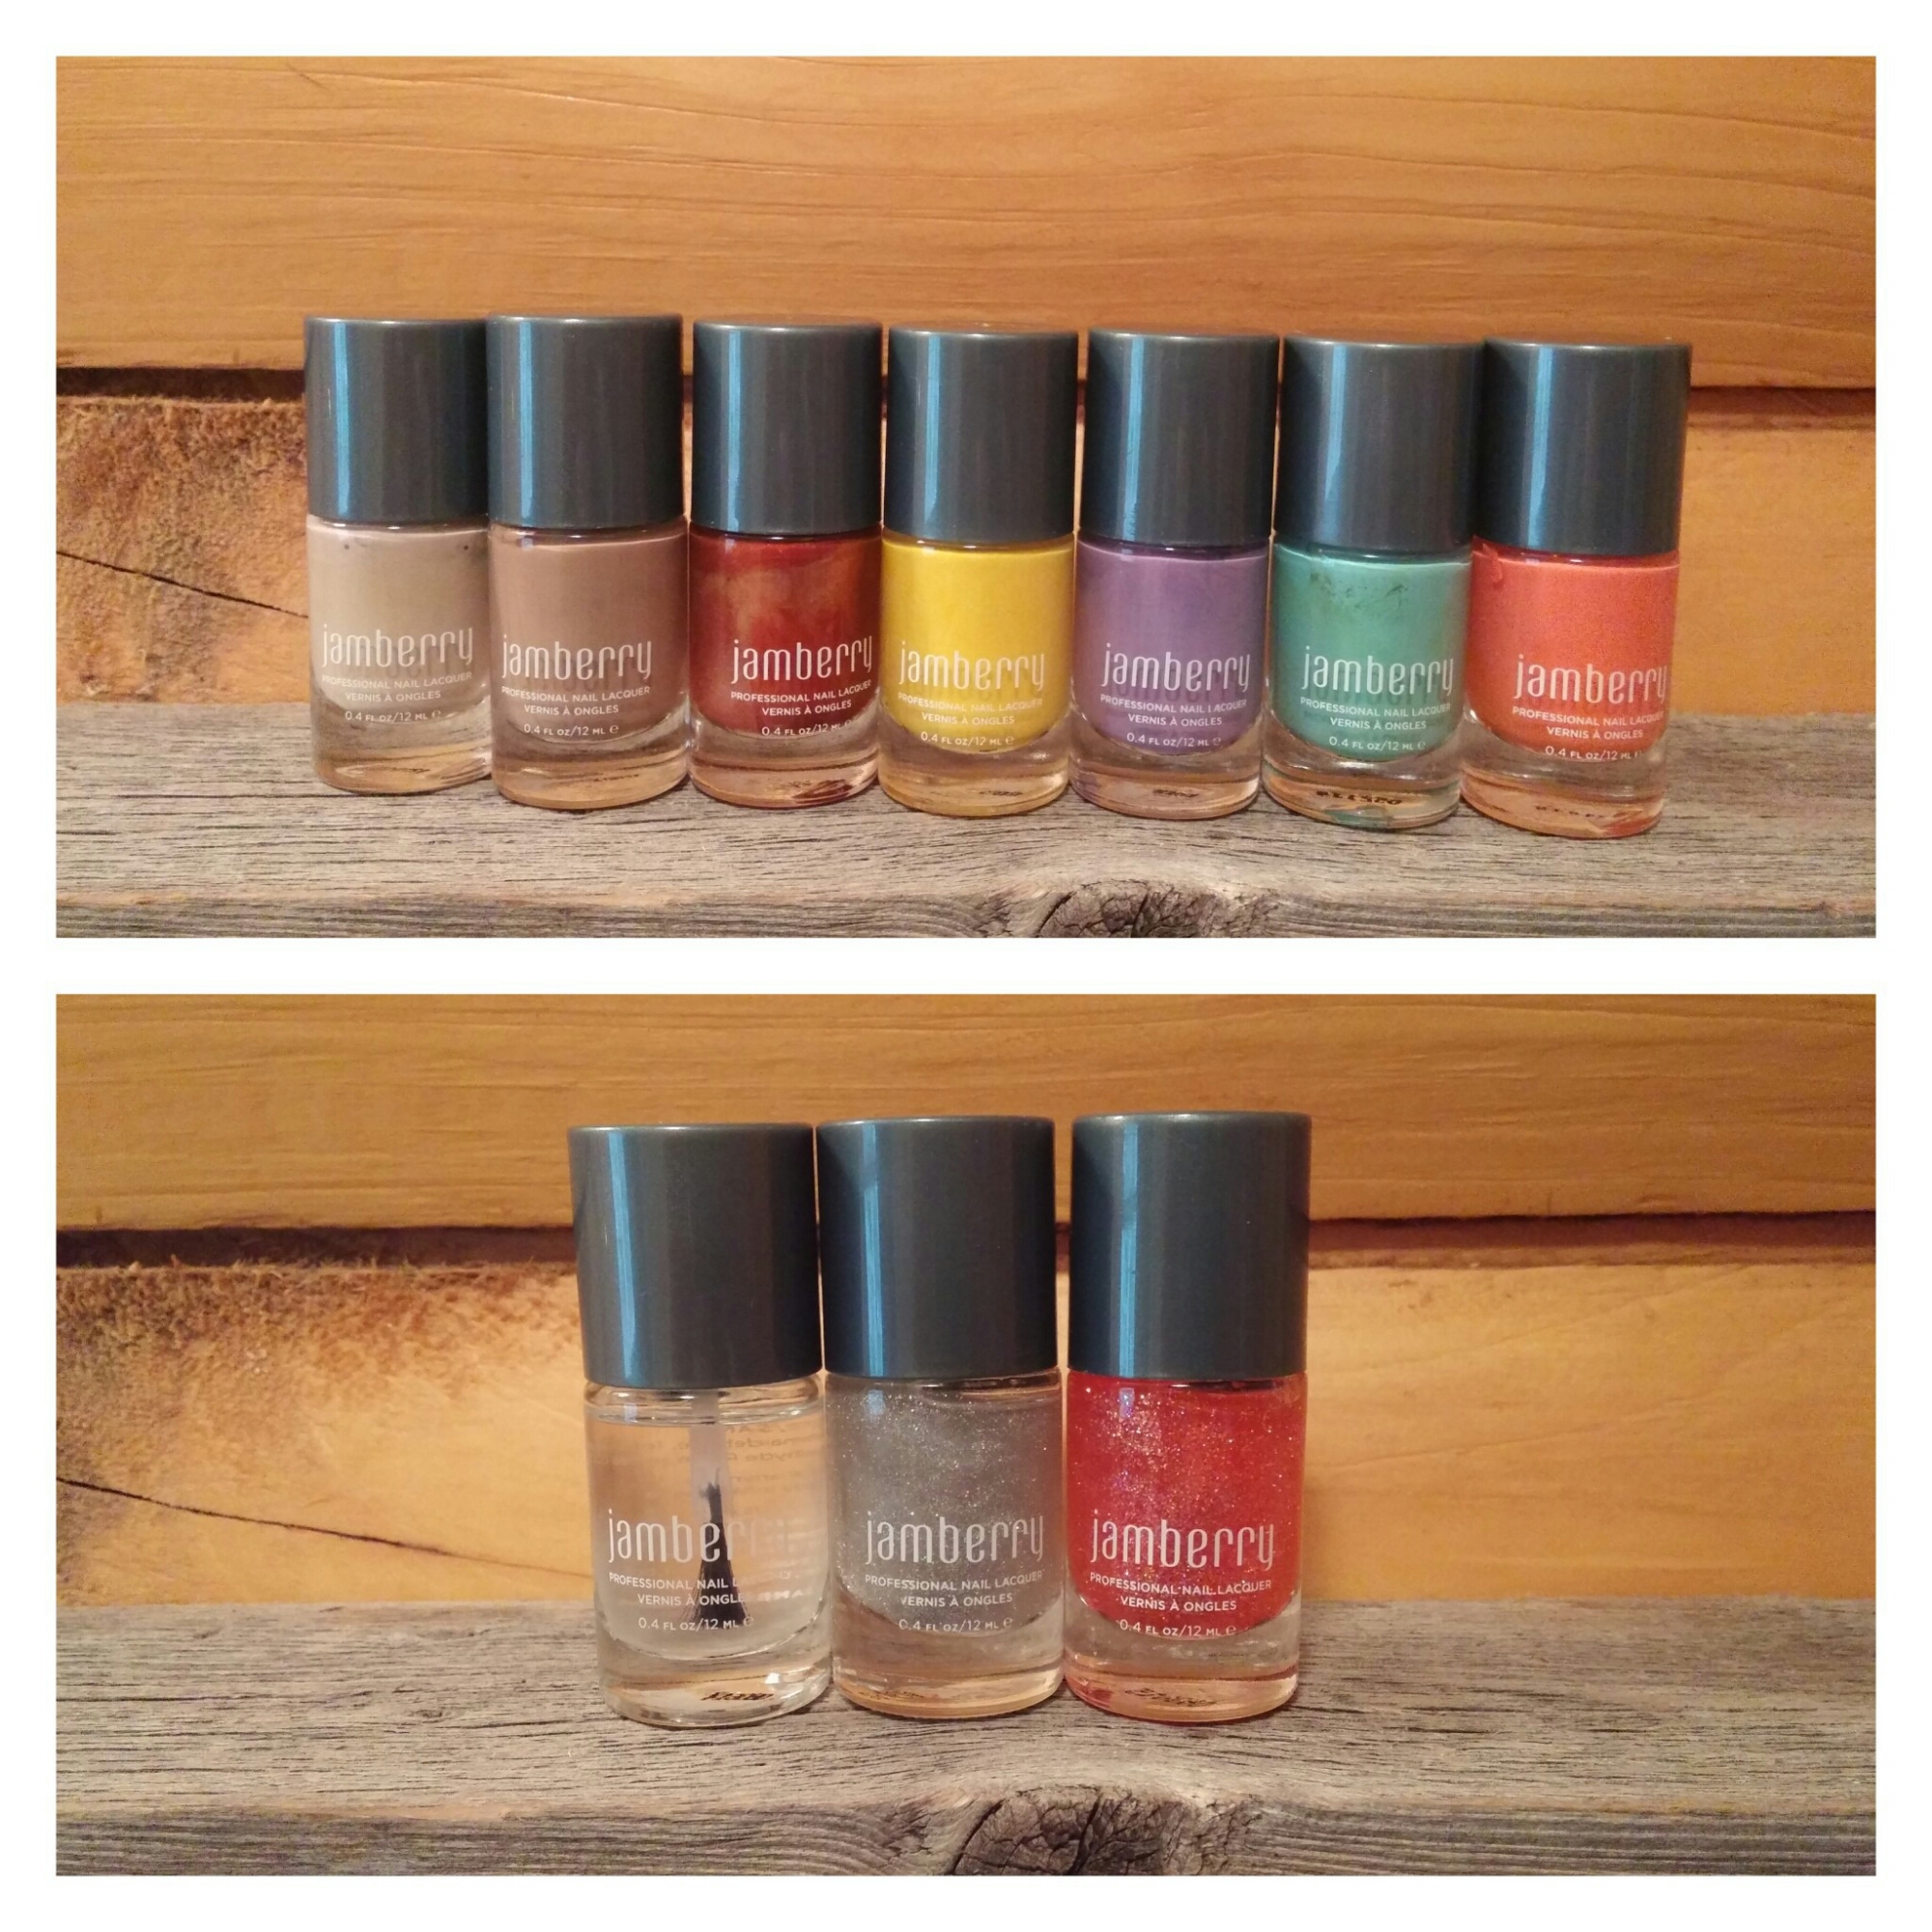
Funny thing happened today. I was browsing my Facebook memories, as I like to do each day, and a year ago I tried the Jamberry lacquer for the first time. As I was looking at this, I was actually painting my nails (with Jamberry lacquer, of course)! I love how this crazy world works sometimes.

So why is this all significant? Because I suck at painting my nails. The last time I probably painted my nails before last year was like a decade ago. Seriously, a 5 year old could paint my nails better that I do. But I had a small stock pile of Jamberry lacquer that I had never used when I decided to try it a year ago. And I wish I had done it sooner because This. Stuff. Rocks. Since then, I have at least doubled my stash, and I usually try to keep my nails painted. Until #sickinitin2016 started.

It goes on ridiculously smooth and fills in the streaks and crevasses I somehow make with a miniature brush. It has a lovely shine to it. And after I clean up a few spots on my right hand, it looks almost like I had an actual manicure. As if I actually left the house and treated myself to such a thing! Really. I am not kidding.

It also holds up better than any polish I have used. Not that I am by any means a nail polish connoisseur. But lasts a million times longer than Sally Hanson. Henson? You know what I mean.

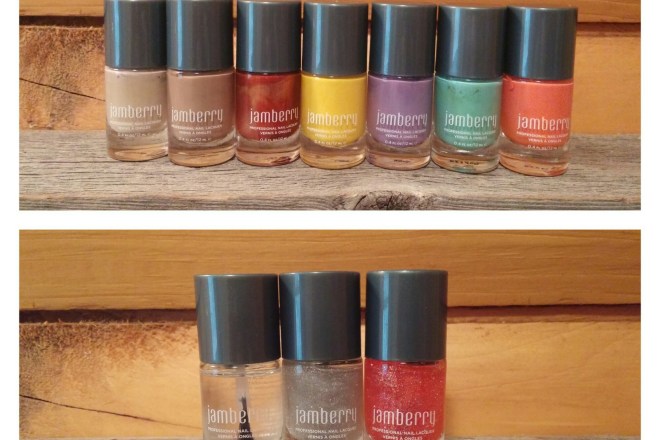
So many amazing colors to choose from. I am partial to the neutrals, but also have so many bright colors that I think next time I need to use one. Spring is in the air, right? Jamberry also offers a selection of base coats and top coats that can add different effects (matte, glitter, sparkle, shine). I also have their gel nail system and use it as my clear top coat for the lacquers. So easy. And it doesn’t take long at all.

Really, Jamberry is more than just nail wraps. Give a lacquer (or three) a try. They are amazing! One of my good friends, Kim Locastro, is a consultant! Check out her site at www.aandkjams.jamberry.com and drop her an email if you have any questions!

image

image

Yes, yes, that is a stain on my shirt. Apparently, I totally dripped some of my Black Bean Soup on myself at lunch. I do, however, totally recommend it. I make it every week for my lunches. Just made a fresh batch today!

Now go, #treatyourself and get some Jamberry lacquer!

Pepper Soup | Dinnertime and the Livin’s Easy

The hubs came home a few weeks requesting that I make Pepper Soup. This was an odd request to me. It involved peppers and soup, two things the hubs doesn’t eat much of. Plus, I had never heard of such a soup. But I was up for the challenge, found a couple of recipes, added my own twist and this batch is pretty dang good! So here it is, Pepper Soup.

image

Pepper Soup

  • Difficulty: easy
  • Print

Ingredients:
2 pounds of lean ground beef (I used 90-10)
4 to 6 cloves of garlic, pressed
Worcestershire sauce, to taste
Soy sauce, to taste
2 green peppers, chopped
1 red pepper, chopped
1/2 yellow pepper, chopped
1/2 orange pepper, chopped
1 small onion, chopped
32 ounces of beef broth
1 cup water
1 15 oz can of tomato sauce
1 15 oz can of diced tomatoes
1 15 oz can of stewed tomatoes
2 heaping tablespoons of packed brown sugar
2 teaspoons dried basil
2 teaspoons dried parsley
1/2 teaspoon dried oregano
2 teaspoons salt
1/2 teaspoon pepper
Starch of choice (rice, pastina, oyster crackers), optional

Instructions:
1. Brown beef and garlic over medium-high heat. Shake some Worcestershire Sauce and Soy Sauce on there while it’s cooking. I know, I know. I hate it when recipes fail to give proper guidance on the amount to use but I just poured a little on and didn’t measure it. After beef is browned, drain and pat dry with paper towels. This is kind of gross, but it makes the soup better.

2. Dump everything except your starch of choice in the crock pot. I like to cut up the stewed tomatoes a little when I put them in. Cook on low for 6-8 hours.

3. If you want to add a starch, prepare as directed (rice or pastina) and add  to the soup about 20 minutes before removing from the crock pot. DO NOT let rice sit in a turned on crock pot for longer because you won’t have soup. You will have super expanded rice with beef and peppers. In our family, I like to eat it without a starch to reduce calories and carbs. The hubs likes oyster crackers. So if you have a starch, you can always add it, if desired, before each serving.